How To - Edit a Datapoint
This article describes the steps to edit a datapoint in the What-If Tool.
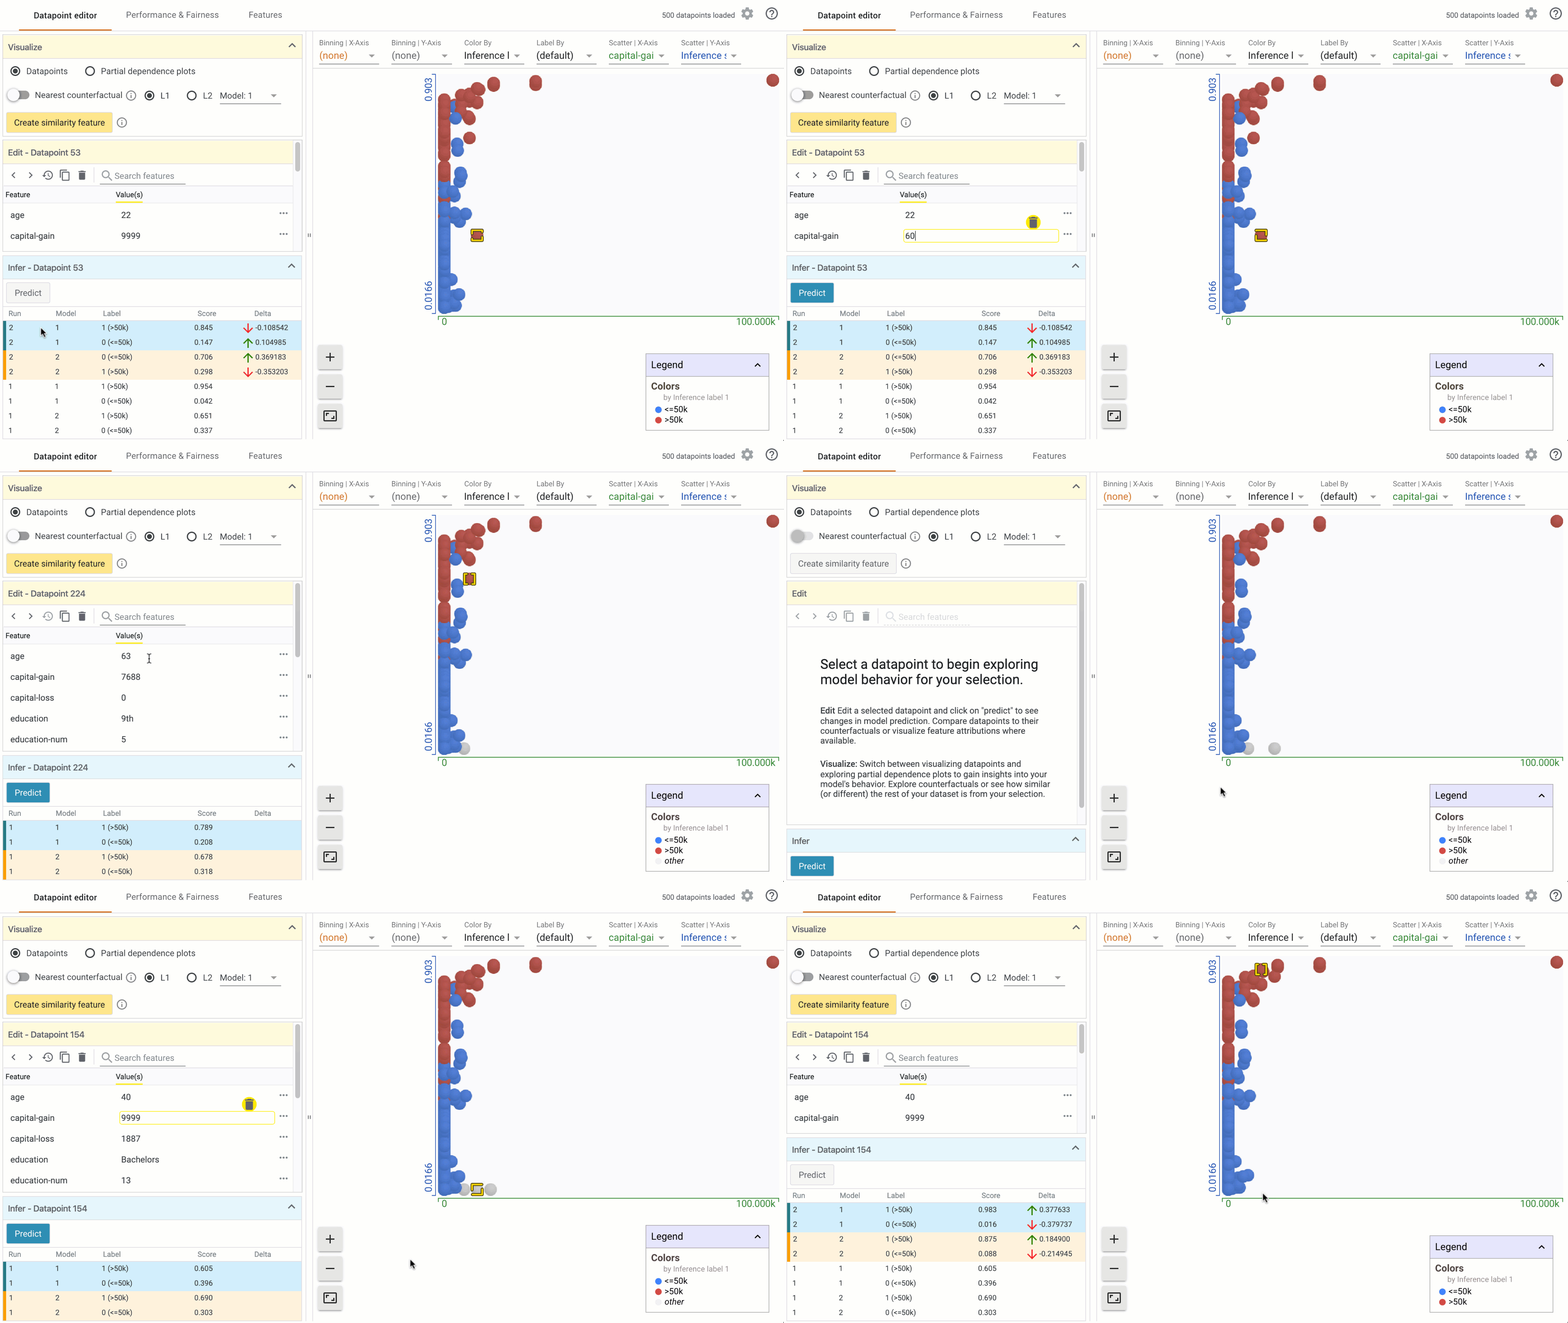
- Select a data point of interest in the custom Datapoints visualization by clicking on it. A list of all features and values associated with that datapoint will appear in the Edit module.

Above: Editing a data point.
-
To change a feature value, click on it. This should highlight the value with a yellow stroke around it.
-
To delete a feature value, click on it to highlight. Then click on the delete icon to delete the feature value.
Deleting a feature value
Deleting a feature value can be tricky business. Missing feature values can cause some models to behave erroneously, unless they are set up to handle missing feature values.
- To get model predictions, click on the Predict button in the Infer module. This is known as a Run. Additionally, clicking the predict button will return predictions for multiple edited data points in a batch run. Until a prediction is available, any prediction-related features utilized in the Datapoint visualization are removed from the datapoint.

Above: Editing three data points and then clicking the Predict button returns predictions for all three data points simultaneously. Edited data points are colored grey and displayed at inference score = 0 in the Datapoints visualization until predicted, indicating that there are no model predictions available for it.
-
To restore an edited datapoint to its original values, click on the revert icon in the toolbar in the Edit module, and then click on the predict button in the Infer module to return model predictions.
-
To duplicate a selected datapoint, click on the duplicate icon in the toolbar. A new instance of the datapoint should be added to the Datapoints visualization. Click on the predict button in the Infer module to return model predictions.
Tracking edited data points
The unique datapoint identity in the heading of the Edit module is handy when tracking an edited datapoint when working with a large dataset. The Infer module displays prediction results for all runs associated with a datapoint, highlighting the difference between two consecutive runs. However, it isn’t possible to save this information outside of the What-If Tool.


